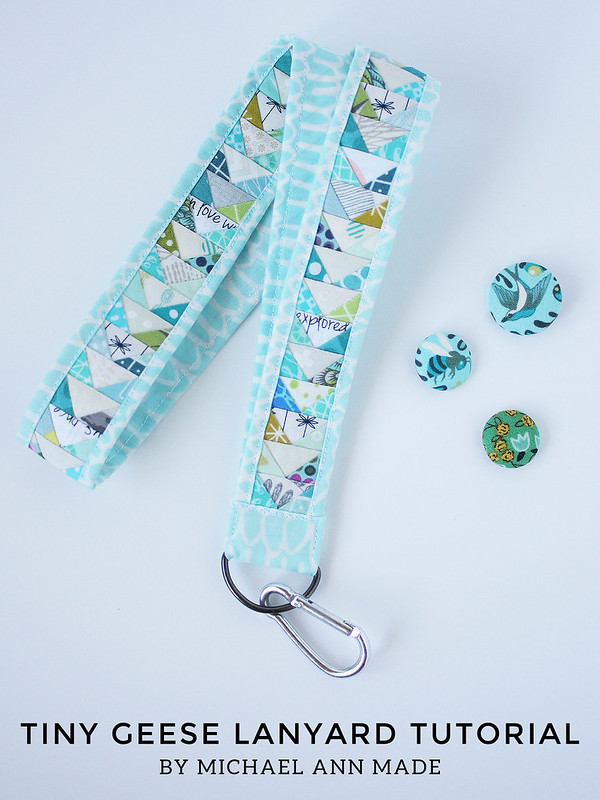
Boy do I have a tutorial for you today!
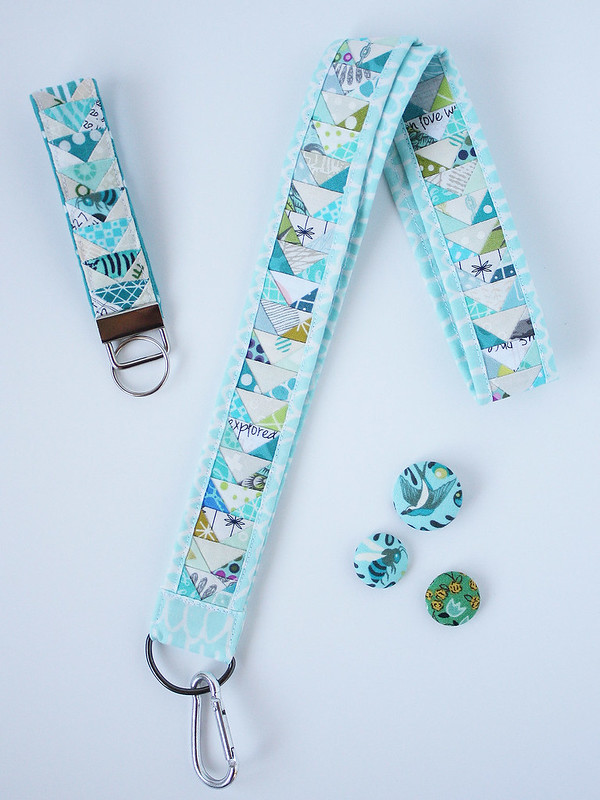
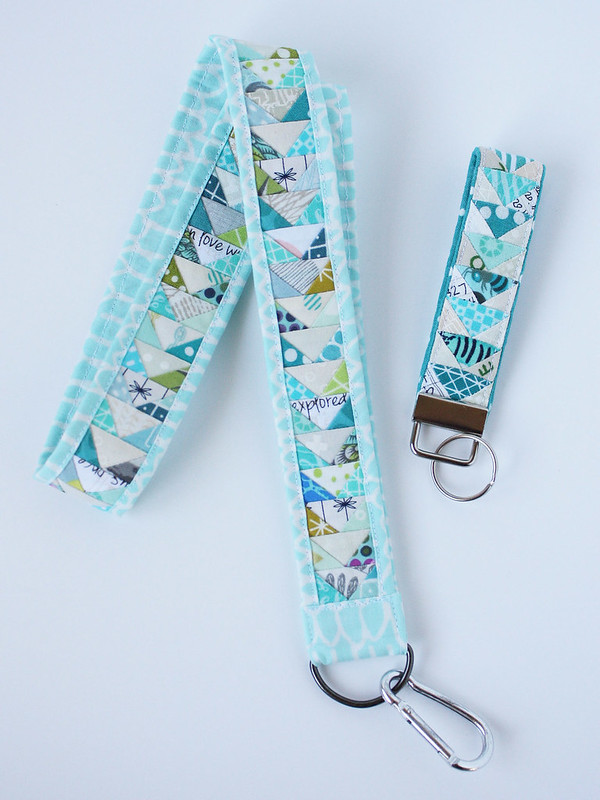
Remember my Tiny Geese Keychain PDF Pattern?
Well my husband put it in my head that I should make a lanyard,
and then a couple of you on Instagram said you were thinking of trying a lanyard,
and then I just couldn't stop fantasizing about what an entire lanyard
of adorably teenie geese would look like!
So I bit the bullet and today I have a tutorial to share with you
so you can hack your copy of the Tiny Geese Keychain to make your very own lanyard!
There is also information on how to lengthen your keychain just a little bit,
in case you need extra length than the 8" finished keychain.
As a disclaimer, this tutorial is not for the faint of heart!
To make this lanyard I ended up piecing almost 200 of those 1/2" x 1" geese!
But I've got to say, the end result is pretty stinkin adorable.
I'm headed to the Swapaholics Retreat to teach in September
and will definitely be bringing this guy along.
I think I'm going to stick my quilt guild name tag on it too and wear it to meetings.
And hello, this is almost a necessity for QuiltCon!
In order to make the construction of this lanyard as easy as possible,
there are a couple instances where this tutorial breaks
from the Tiny Geese Keychain pattern instructions.
Those instances are highlighted in bold,
but be sure to read through this tutorial carefully before you begin sewing!
So grab your scrap bucket, print off your pattern,
put in a good, long movie, and let's get started!

Materials ::
- For the Keychain you need 1" hardware (either D Ring or Keyfob Hardware)
but for the Lanyard you will need 1 1/4" Hardware
(D ring, Keyfob Hardware, or Swivel Lanyard Clip Hardware)
- You may also wish to use a leave in Paper Piecing Foundation
so you don't have to rip out the paper in the end.
Cristy of Purple Daisies Quilting sent me some of her Applique Foundation
to try and it was perfect for this project!
- You will also need a much longer piece of fabric for the backing
(2 1/2" by the length of the lanyard)
- And a copy of the Tiny Geese Keychain Pattern!
To Make The Lanyard ::
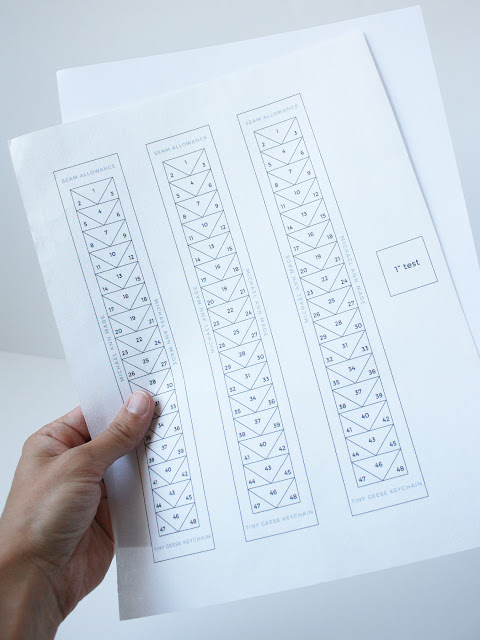
First print off your pattern pieces, enough to make your lanyard.
If using a leave in foundation, cut the foundation to size and put that straight through your printer.
In hindsight, I wish I would have printed mine lighter
because the dark lines showed through the light colored fabric I used for the lanyard backing.
Consider playing with the brightness/contrast or printer grey scale settings
if you are using a light colored backing fabric and the leave in foundation.

Start with two of your pattern pieces, with both cut along the seam allowance line.

Cut the seam allowance OFF of the second pattern piece
so the pattern ends at the design line.

Layer the second pattern piece on top of the first so that the design lines match up,
completely covering the seam allowance.
Use a spot of white glue and heat set with your iron, or a couple pins to hold them together.

Decide on the final length you would like your keychain/lanyard.
Keep piecing patterns together (each pattern is 8" long) until you reach your desired length.
If you want a length that is not a multiple of 8,
count out two geese for every additional inch you want added (each geese is 1/2" tall)
Mark directly on your pattern the new design line (where you will stop sewing).
Also be sure to mark a 1/2" Seam Allowance!

Cut off the additional pattern at the Seam Allowance line.
It can help you to remember the last 1/2" is seam allowance by scratching out the design.
Now you're ready to piece!


Piece your lanyard using standard paper piecing techniques
or the keychain pattern instructions.
If you're making a lanyard, get yourself comfy and have fun!

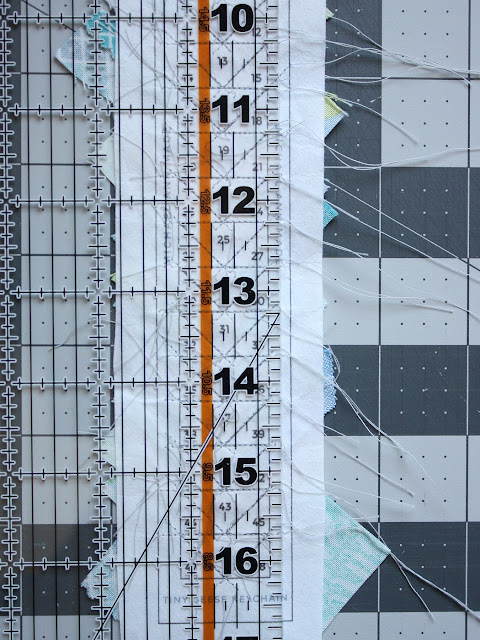


When you're done, we will be trimming the side seam allowances to 1/8"
as opposed to the 1/4" drawn on the pattern.
Just line up your ruler along the finished geese, 1/8" away from the design line and trim.
Make sure you trim both sides.

Now you should have a whole string of adorable tiny geese!
If you used paper as a foundation, go ahead and tear all your paper out.
If you used a leave in foundation, continue on!

Cut your piece of backing fabric 2 1/2" wide by the length of your keychain/lanyard.
Press both long sides down 1/2", trying to be as accurate as possible.
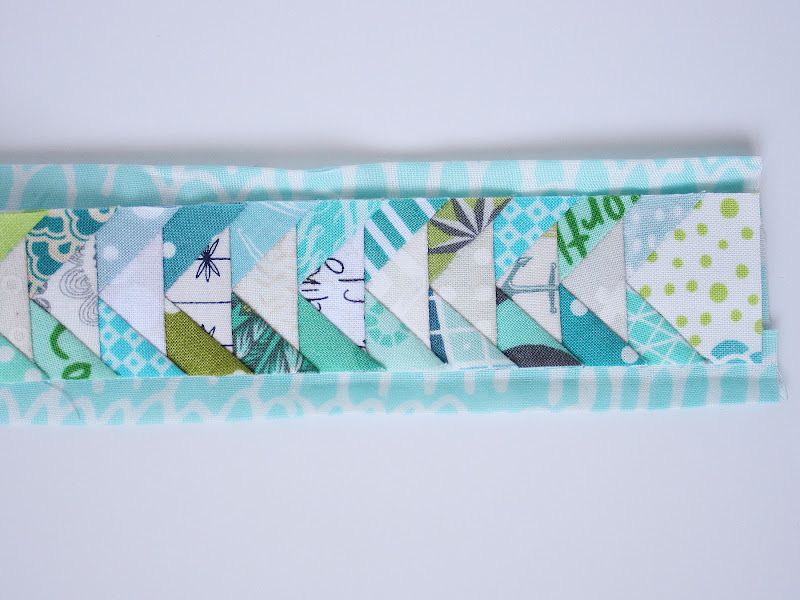
Lay your backing fabric right side down.
Lay your geese panel right side up on top,
so that the raw edges of the backing fabric are covered
and the folded sides extend 1/4" on either side of the geese.

Bring the folded edge of the backing fabric down, over the geese panel,
so that the fold lines up with the edge of the geese,
or where the design line/seam allowance line would be.
Be very careful not to pull the fold too much and take fabric width away from the other side.
You want to make sure the geese panel stays centered on the background fabric.

Use your favorite method to baste the folds in place - pins, Wonder clips, or glue basting.

Top stitch down each side, right alongside the fold.


And you're almost there!
Finish off your keychain/lanyard following the pattern instructions for your type of hardware.
If using the D Ring hardware finish (which could also be used for a swivel clip),
be sure to add an additional 1" to the width of the attachment fabric piece.
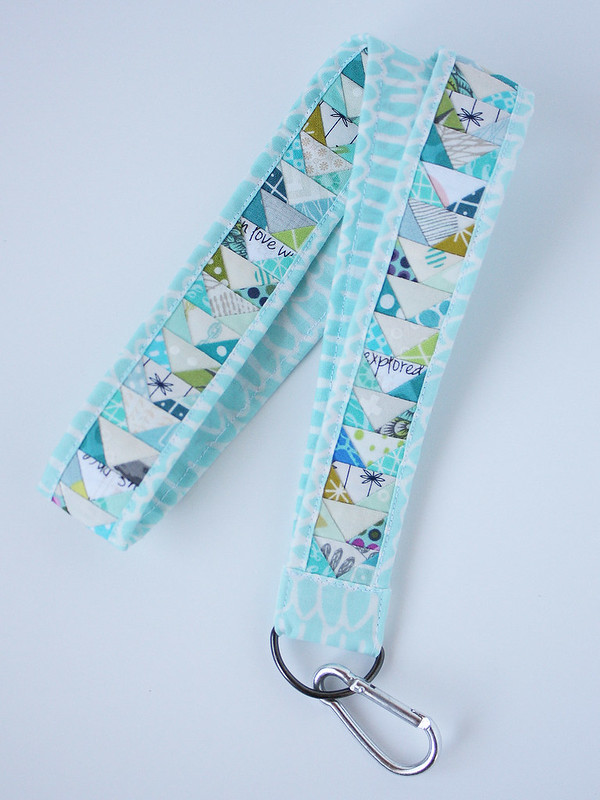
Now look at that!
You just made the world's most adorable quilty lanyard!
You should definitely go celebrate by taking your lanyard
for a spin to the fabric store to buy more fabric ;]
Good luck sewing, and if you make one, I'd love to see!
Be sure to tag #tinygeesekeychain, #michaelannmade or @michaelannn on Instagram!
Have fun!
(PS - I did receive a sample of the Applique Foundation for free,
but all opinions mentioned in this post are my own
and I would totally buy it again for this project!
If you're interested in working together with me on a project or tutorial,
just let me know!)
Welllll crap that's cute! :D
ReplyDeleteVery cute!
ReplyDeleteVery cute!
ReplyDeleteI am really excited about this. My son bought me to mini jelly rolls of 1" strips and I have been looking for a project to use them. This may be it.
ReplyDeleteReally want to make one ( or two) of these. Thank you for sharing!
ReplyDeleteToo stinking cute. My best friend and I will have one of these....hers in red, mine in purple.
ReplyDeleteToo stinking cute. My best friend and I will have one of these....hers in red, mine in purple.
ReplyDeleteThat is super adorable.. I want one and I go back to school tomorrow! Not enough time today...but saving for another time because its tooooo cute
ReplyDeleteI'm totally in love with this! Looking forward to making one or two or three..............:-)
ReplyDelete