sorry about this having the longest post title in the world, haha!
but i am so excited for this diy today.
my may sponsor fashion art projects
sent me a couple goodies earlier in the month to use in projects for you guys!
i was super super excited to try out their fabric spray paint,
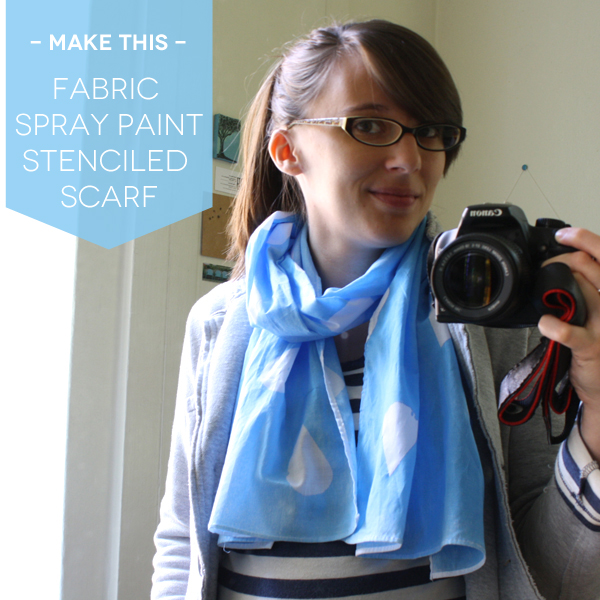
and just love how this little rain drop scarf turned out.
here's a little diy for you to make your own fabric spray paint stenciled scarf!

materials you'll need -
- fabric spray paint! i used the kind from fashionartprojects.com
- masking tape, contact paper, or freezer paper - for making your stencil
- a white cotton scarf - natural fibers like cotton, wool, or silk hold the dye/paint much better

first, decide on your pattern and make your stencils.
inspired by my ever rainy portland home town,
i decided to use a simple and bold graphic of a rain drop.
i just cut out a bunch of raindrops from some extra wide masking tape i had.
tip - to make your pattern look more professional,
have some of your pattern bleed off the edge of the fabric.

once you're all stenciled, it's time to spray!
make sure you have plenty of space to get dirty.
since it was raining outside i had to cover my whole kitchen floor with paper before i sprayed.
i was excited for the uneven covering of the spray to give my scarf a more hand dyed look,
so i sprayed by starting off the fabric, then sprayed here and there with a light coat,
and let it dry a little before spraying one more here and there uneven coat.
you could also experiment with making wrinkles and folds in the fabric before you spray
to give it an even more tie dyed look.
also, be sure to test it out on a scrap piece of fabric before you start
to make sure your paint can isn't sputtering at all!

when you're done spraying, remove all your stencil pieces and let it dry!
and tada! you have a fabulous fancy scarf!
it's a little hard to see in that photo, but i just love the uneven coloring.
and one more note, it was only after i finished that i realized
if i wanted to make this scarf make sense in both directions,
i should have reversed every other row of rain drops... oh well!

and there you have it!
so so easy, and it looks like you spent so much time hand dying it to perfection!
i think this counts as my "treat yourself" homework assignment project, don't you?
also i just had to throw in this full length picture so inquiring minds (meaning my family)
can see just how big this baby is getting these days!
good thing scarves will fit me this whole pregnancy!
one last thing - -
don't forget to post a picture of your finished homework assignment to the facebook page,
i'll be looking for some to feature here on the blog tomorrow!
good luck crafting!!
How cute is that scarf!!!! I didn't even know they made spray paint for fabric. This would be great for maybe some curtains or something... do you think doing an ombre effect would be hard? GREAT JOB!
ReplyDeleteyah i think an ombre effect would be so easy to do! i had a couple other colors and might try that out next time, great idea!
DeleteOOOH really cute! I've never used fabric spray paint before. I'll have to try it one day! Great post
ReplyDeletestill haven't gotten to homework yet lol
Christine
dela chic
That turned out absolutely awesome! I love the rain...and the rain motif! I just got some of this spray paint and have never tried it out. Now I can't wait to think of something to use it on!
ReplyDeletexo