Are you guys ready?
Week one of the Halloween Medallion is here!
Lessons I learned in preparing for this week -
1 - Don't do math while jetlagged on an airplane.
2 - Don't chain piece five blocks without first doing a test block.
3 - You quilty people are the best people in the whole world!
I started sketching and planning this quilt before, during, and after the Swapaholics Retreat I just taught at. This was a fun way for me to de-stress, but it also meant that I was exhausted. I planned to use the Raspberry Kiss Block tutorial, exactly as written on Rachel of Wooden Spoon Quilts blog. Yesterday, I went on my merry way, chain piecing five of the ten blocks before bed. Only then did I take my ruler out and measure... And I was half an inch off!
A whole bunch of crazy quilt math later (involving a lot of sixteenths of an inch - yikes!) I messaged Rachel to ask her advice. And she replied! She was so generous and helpful and I can't thank her enough for taking the time to help a quilter like me!
All of this is to say - our casual quilt along is off to a fantasticly casual start!
The math is done, the test block is fixed, and this quilt is going to look so stinking cool I can hardly wait to see what you all sew!

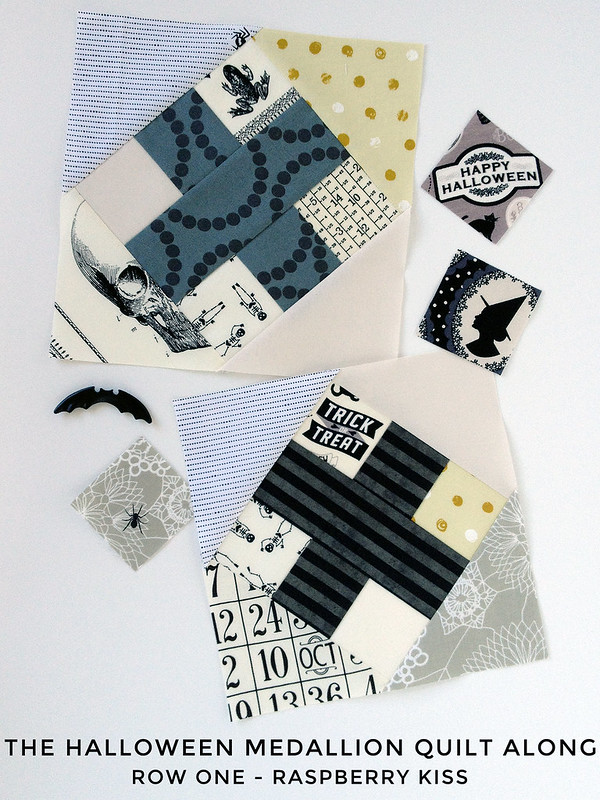
Round One consists of 10 Raspberry Kiss Blocks
(as invented by Rachel of Wooden Spoon Quilts)
with five blocks on either side of your panel
(reference your Planning and Coloring sheet for placement)
The blocks measure 8 1/2" square unfinished, 8" finished.
The image above contains the measurements and cutting instructions for all 10 blocks.
You can pin the image on Pinterest, "save as" to your computer to print,
or screen-cap it to your phone for easy reference.
Now for the fun part -
In order for the block to be the right finished dimension,
you will need to sew the inner square cross with a "generous 1/4" seam allowance".
This means, sew with a seam allowance that is maybe a couple stitches wider than you normally do.
(Technically, with a 5/16" seam allowance, but who has time for that!?)
After you have cut your blocks,
visit Rachel's Raspberry Kiss tutorial for all the information you need
to construct and trim your block.
Here are a couple tricks I found handy while stitching these blocks -

When constructing the inner square cross, the A+B+A block will end up between 1/8" and 1/4" shorter than the C block. This is exactly what you want to happen when you use your "generous 1/4" seam allowance"! Just line up both A+B+A blocks so that the C overhang is on the same side.

When you are done with the inner square cross, go ahead and trim off the C block overhang.
The finished center block should measure 6 1/8" x 6 1/8", so trim your block accordingly if it is a little bit off.

Now, you can stitch your corner triangles using your standard 1/4" seam allowance,
and the instructions in Rachel's tutorial!
I have included a bit extra width in the corner triangles so that you can trim it down to the 8 1/2" x 8 1/2" unfinished size when you're done. Because as we've learned, sometimes mistakes happen, and it's nice to have a bit of wiggle room ;]
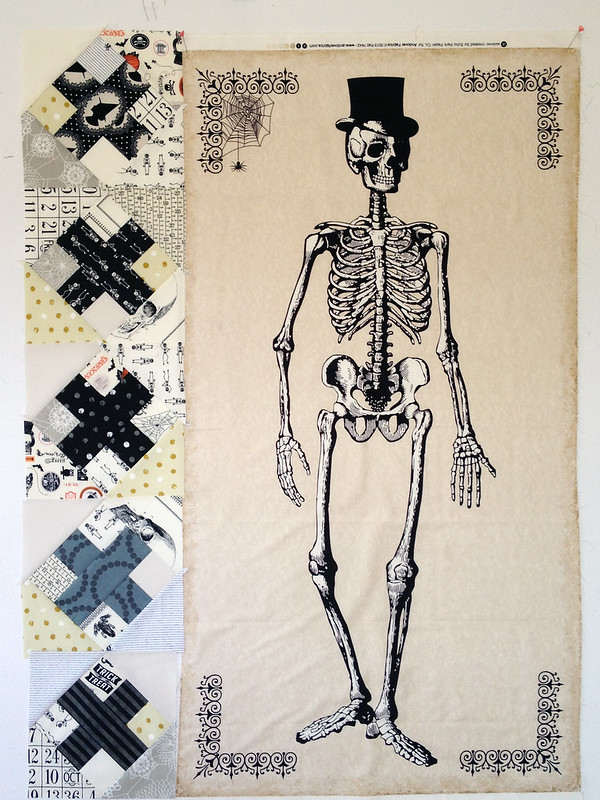
Continue making Kisses until you have ten blocks, and align them in a row of five on either side of your panel. As you can see, I only got to one side. But don't worry, I will definitely be posting on Instagram later this week when I get them all done!
I will talk a little bit about medallion quilt construction in a later post,
so at this point you can just pin your finished blocks up and admire your work.
Be sure to share your photos on Instagram with the tag #HalloweenMedallion
so I can see all your amazing quilts in progress!
And thank you all for being the best quilty friends a girl could want :]
Boo! Hugs and 'Kisses' from me to you! Perfectly 'spooktacular', like everything you do.
ReplyDeleteWhat a beautiful start....I'm going to pin this for future use!! 😘😘😘
ReplyDeleteMichael Ann- I need 42 1/2" length to cover my Mr. Chillinsworth panel. Have you sewn your side Raspberry Kiss blocks on yet? Help!
ReplyDelete